Quick Start
You can configure the appropriate deployment method to deploy your K8s applications by Nocalhost IDE plug-in. Nocalhost supports the following types to deploy applications:
- RawManifest
- Helm
- Kustomize
Deploy Config Structure#
Dev Config is a part of Deploy Config. The simplest structure of Deploy Config is as follows:
application includes the application name, application type and the resource array.
- Application name will be displayed in Nocalhost plug-in. If the application type is Helm, it will be of the form
Release.Name. - Applications are generally divided into three types, RawManifest, Helm and Kustomize. The deployment methods are different for different types, which is why it is necessary to distinguish types.
- The last one is the resource path, which contains the paths of all the resources to be deployed.
Deployment configuration is usually declared through config.yaml
The name of Deploy Config is normally config.yaml, which is also the recommended name, but it is ok to use other names.
config.yaml has to be placed in the .nocalhost folder in git root directory.
A Quick start for Deploy Config#
We use bookinfo as an example here to introduce Deploy Config of Nocalhost.
RawManifest Minimized Configuration#
The following is an actual Nocalhost Deploy Config, indicating that this is a RawManifest application, resourcePath contains all resource paths, when deployed, they will be applied to the api server through kubectl apply.
The directories are as follows, .nocalhost folder is created in the root directory, and config.yaml file is under the folder.
Use the following commands to experience.
Deploy the application by Nocalhost plug-in#
You can right-click any namespace on Nocalhost plug-in, then click Deploy Application and select clone from git. Enter https://github.com/nocalhost/bookinfo to Git URL column and manifest/config/example to the branch column.
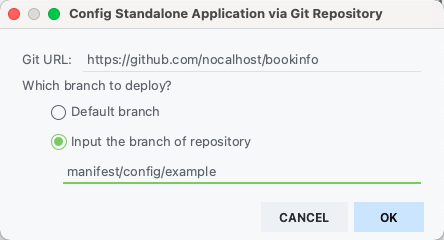
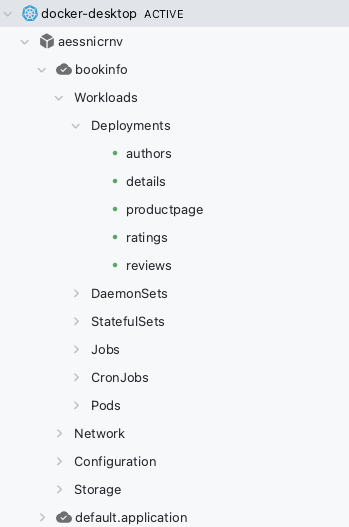
Nocalhost will deploy this RawManifest application after you click OK. Now, you can find bookinfo under namespace.
Customize resourcePath and ignoredPath#
resourcePath is an array used to specify the RawManifest files to be deployed. For example, for the above application, if you only want to apply *job*.yaml, you can change the configuration as follows.
Moreover, Deploy Config also supports setting ignoredPath. For example, for the above application, if you only want to apply all manifest without *job*.yaml, you can change the configuration as follows.
Kustomize Minimized Configuration#
Just like RawManifest, config.yaml for Kustomize type is as follows. It indicates that this is a Kustomize application named bookinfo-kustomize and resourcePath is the directory corresponding to kubectl apply -k.
该项目的目录结构如下,kustomize/base 对应到 kustomization.yaml 所在的相对目录:
Its directory structure is as follows, and kustomize/base corresponds to the directory containing kustomization.yaml.
Use the following commands to experience.
Deploy this application by Nocalhost plug-in
You can follow the above instructions in Deploy the application by Nocalhost plug-in and enter kustomize/config/example to the branch column.
Helm Minimized Configuration#
Like Kustomize, config.yaml for Helm type is as follows. It indicates that this is a Helm application named bookinfo-helm and its resourcePath is the directory corresponding to helm install .
Its directory structure is as follows, and charts/bookinfo corresponds to the directory containing Chart.yaml.
Use the following commands to experience.
Deploy this application by Nocalhost plug-in
You can follow the above instructions in Deploy the application by Nocalhost plug-in and enter helm/config/example to the branch column.
Pre-Configure Dev Config in Deploy Config#
info
Please note that we assume that you have already known Dev Config before reading this section.
Dev Config can be embedded in Deploy Config. That brings a benefit that Nocalhost configuration would be contained in the application deployment process, which eliminates the repeated configuration work in the new environment. There is no conflict here, because it is equivalent to automatically associating Dev Config with the service after the application is deployed.
Example#
The bookinfo application we used above has several workloads which are deployment type. Now, let us configure them as follows.
Apart from the above minimized configurations, we introduce an array named services, in which the elements are Dev Config .
Use the QuickStart sample to experience
The demo application embeds Dev Config in Deploy Config.
After deploying demo application, just right-click a workload under this application, such as Deployment / details. You will find that it has been configured with a series of development configurations in advance, so you can directly enter the Dev Mode based on them.