Development with Nocalhost
Nocalhost allows you to develop applications directly inside a Kubernetes cluster.
Using Cluster Inspector#
Nocalhost build-in a cluster inspector. You can use the cluster inspector to browse resources in the Kubernetes cluster, deploy your application and select the workload that wants to develop and debug.
Resources Status#
Nocalhost uses the following icons to describe the status of different Kubernetes resources in cluster inspector.
| Resource | Status | Icon | Description |
|---|---|---|---|
| Cluster | Active | Connected to cluster | |
| Inactive | Unable to connect to cluster | ||
| DevSpace | Normal | Normal DevSpace/Namespace | |
| Read Only | This DevSpace/Namespace is readonly, can not operate | ||
| Application | Active | Application is able to operate | |
| Inactive | Application is inactive, unable to operate | ||
| Loading | Installation or uninstallation | ||
| Development Mode | Start DevMode | The workload is in DevMode | |
| End DevMode | End DevMode | ||
| Others | Others enabled DevMode | ||
| DevMode and Port-Forwarding | In DevMode and port-forwarding enabled | ||
| DevMode and Port-Forwarding, enabled by others | Others enable the workload into DevMode and port-forwarding | ||
| Nocalhost Configs | Normal | This workload has Nocalhost configurations | |
| Warning | Nocalhost configurations is empty | ||
| Workload Status | Not Ready | This workload is not ready, e.g. deploying | |
| Running | This workload is running | ||
| Failed | This workload has failed to run | ||
| Unknown | This workload status is unknown |
Before Entering DevMode#
There are some configurations that you need to take care of before DevMode.
Source Code Directory#
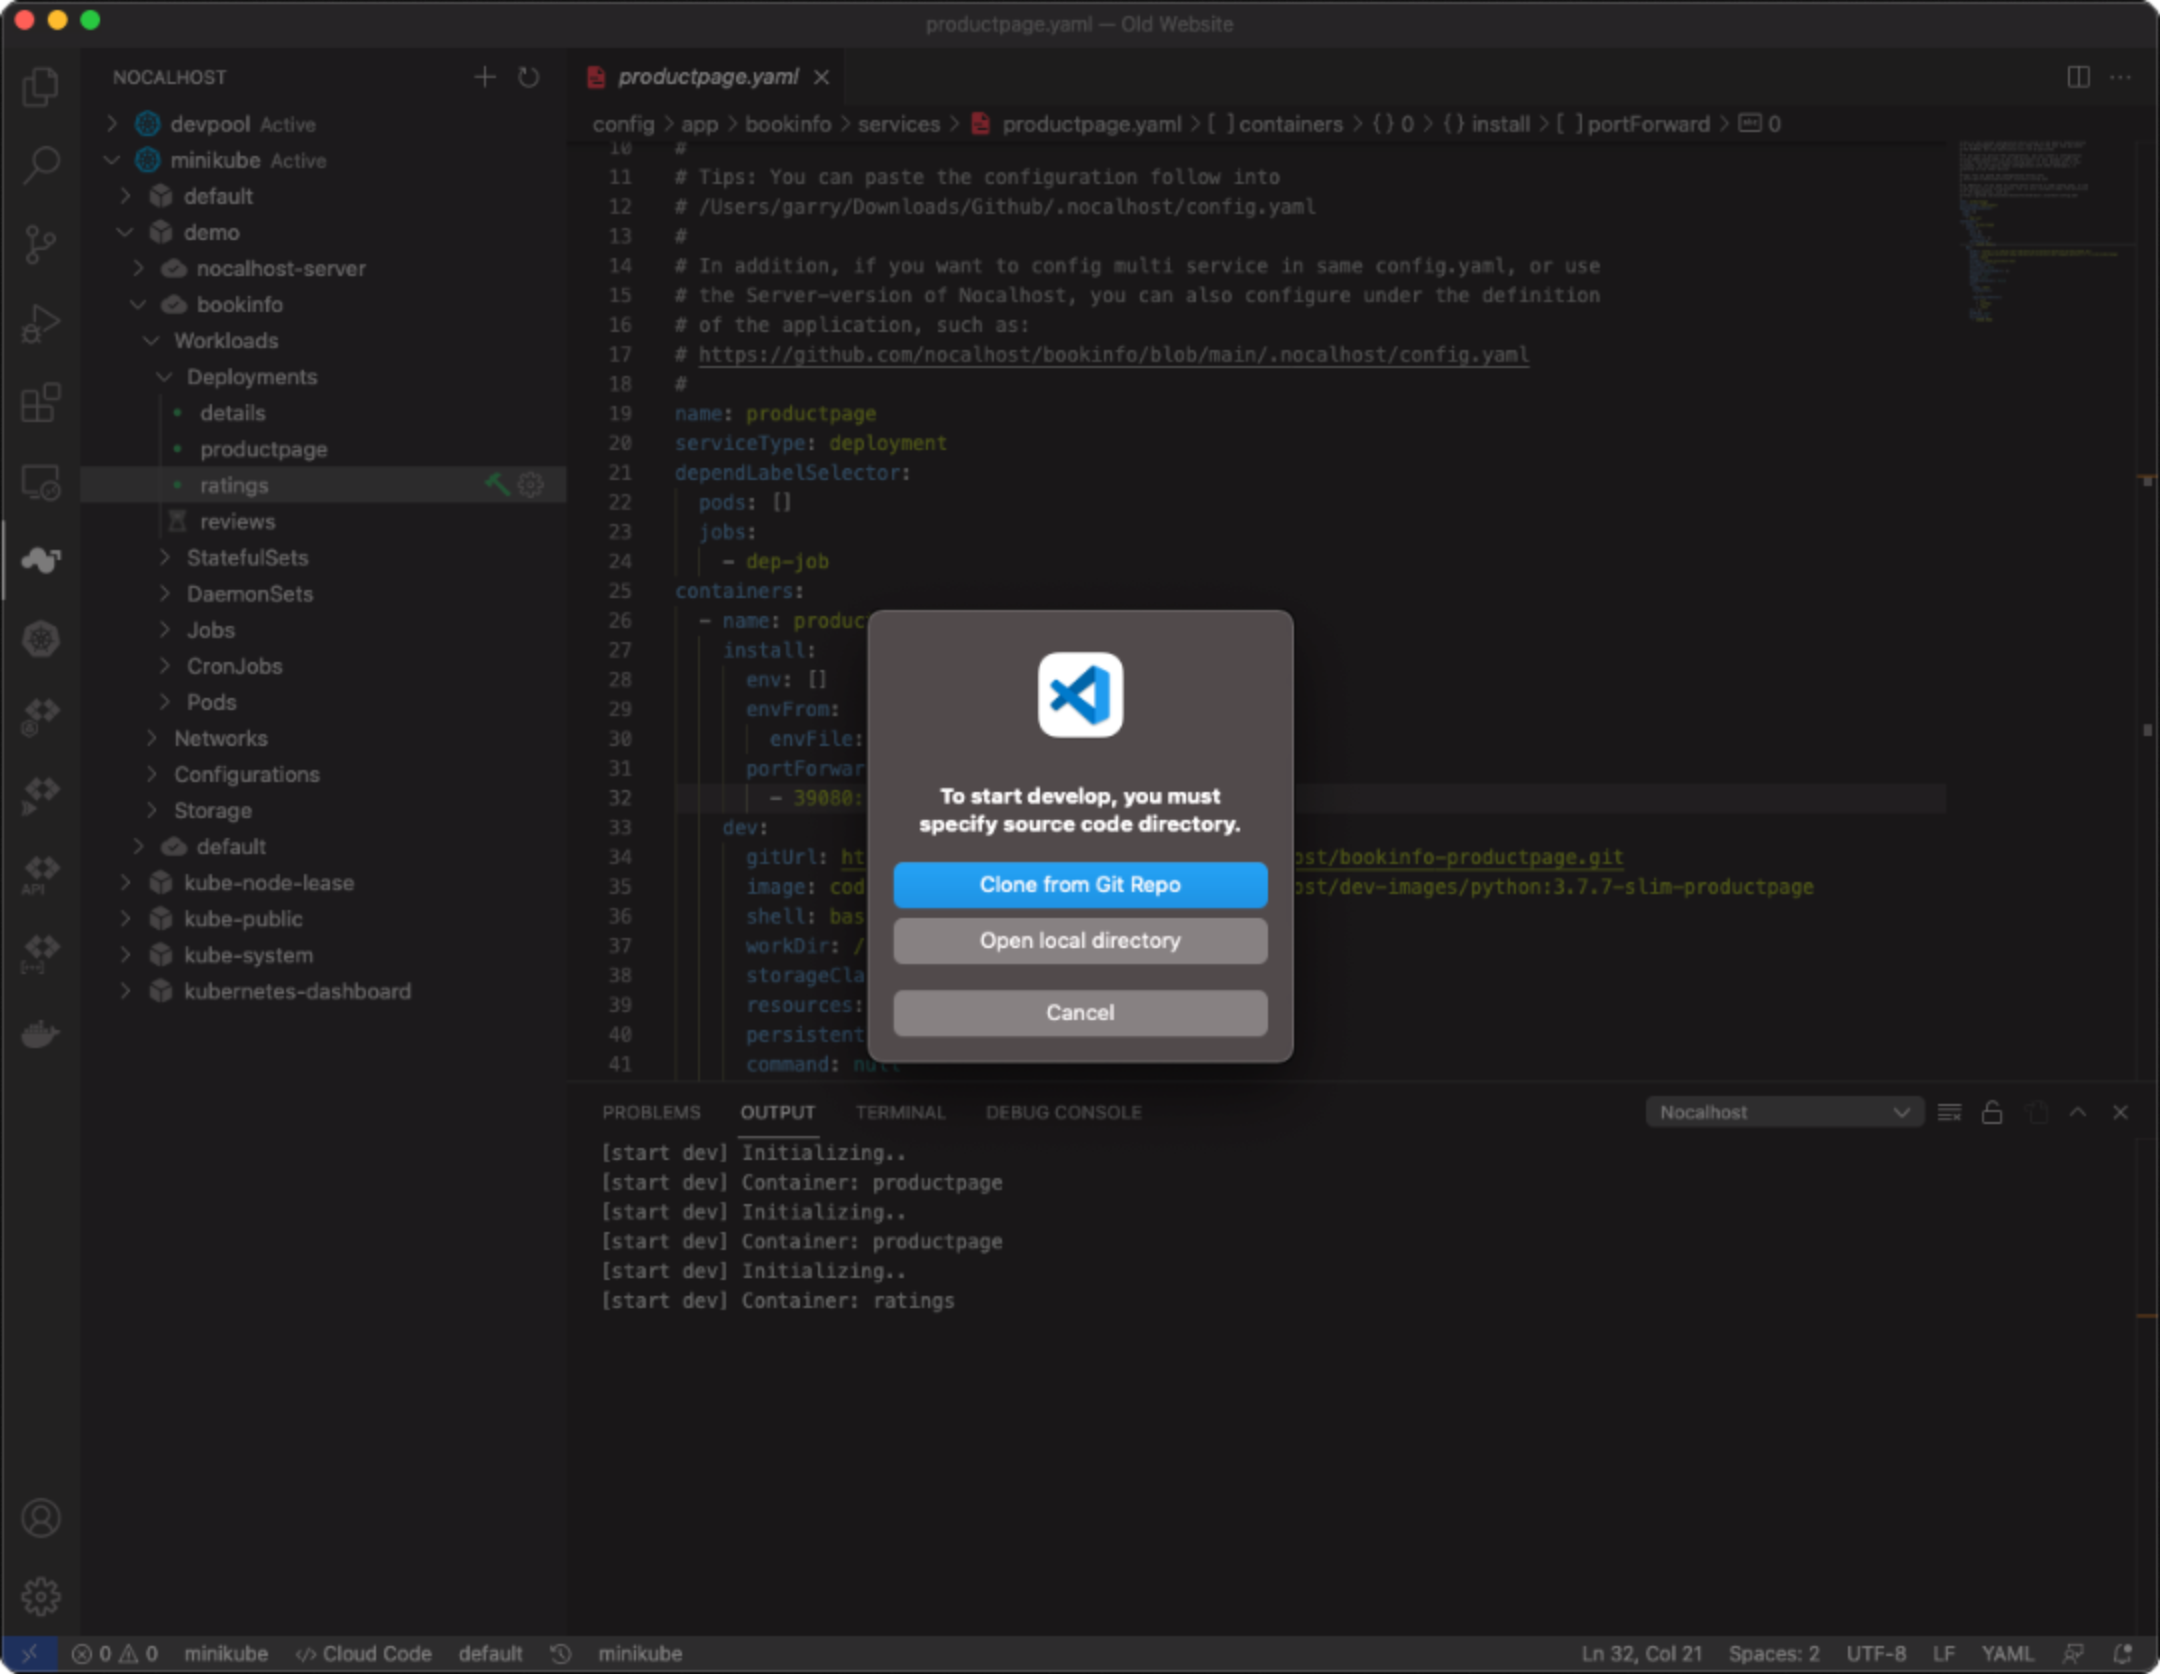
Before developing the application, you need to tell Nocalhost the location of your source code, so Nocalhost can synchronize your source code files to the remote container. You can either specify a local directory or clone your source code from the Git repository through Nocalhost.
You can Associate Local Directory before entering DevMode. Alternatively, Nocalhost will check the directory path. If you do not have an associated directory, Nocalhost will pop the selection menu to ask you to `specify the source directory. You can Open Local Directory or Clone from Git Repo.
Associate Local Directory#
You can associate the local source code directory to a workload before entering DevMode. Once you associated this directory, Nocalhost will save this directory path in the database.
When you entering DevMode, Nocalhost will use this path directory instead of asking for input.
Steps:
- Select the workload
- Right-click and select the
Associate Local DIR - Choose the local directory and confirm the selection
Cross IDE
If you have associated the directory in one IDE already, once you develop the same workload in the other IDE, Nocalhost will still use the directory path set before.
For example, when a workload is associated with a directory in VS Code, then switch to IDEA. Nocalhost will firstly use the directory you associated in VS Code until you associate again.
Open Local Directory#
You can select any local directory and confirm the selection. Nocalhost will save the directory path in the database.
Clone from Git Repository#
Limitation
Nocalhost will not clone source code from Git if you have already associated or opened the directory.
Nocalhost can help you to clone the source code from the Git repository within the IDE.
If you choose Clone from Git Repository, Nocalhost will try to clone the source code from URL according to the dev.gitUrl section or ask you to input the Git URL.
Auto-associate
Nocalhost will associate the directory to the clone directory automatically after codes are cloned.
Development Container#
Nocalhost will replace the workload containers when entering DevMode with development container. Nocalhost will load the container[*].dev section from the Nocalhost configuration.
Development Image#
Nocalhost needs to know which development image to use before entering DevMode. Nocalhost will use image defined in dev.image or ask you to input one.
You can use the docker image provided by us or use any custom image for development image.
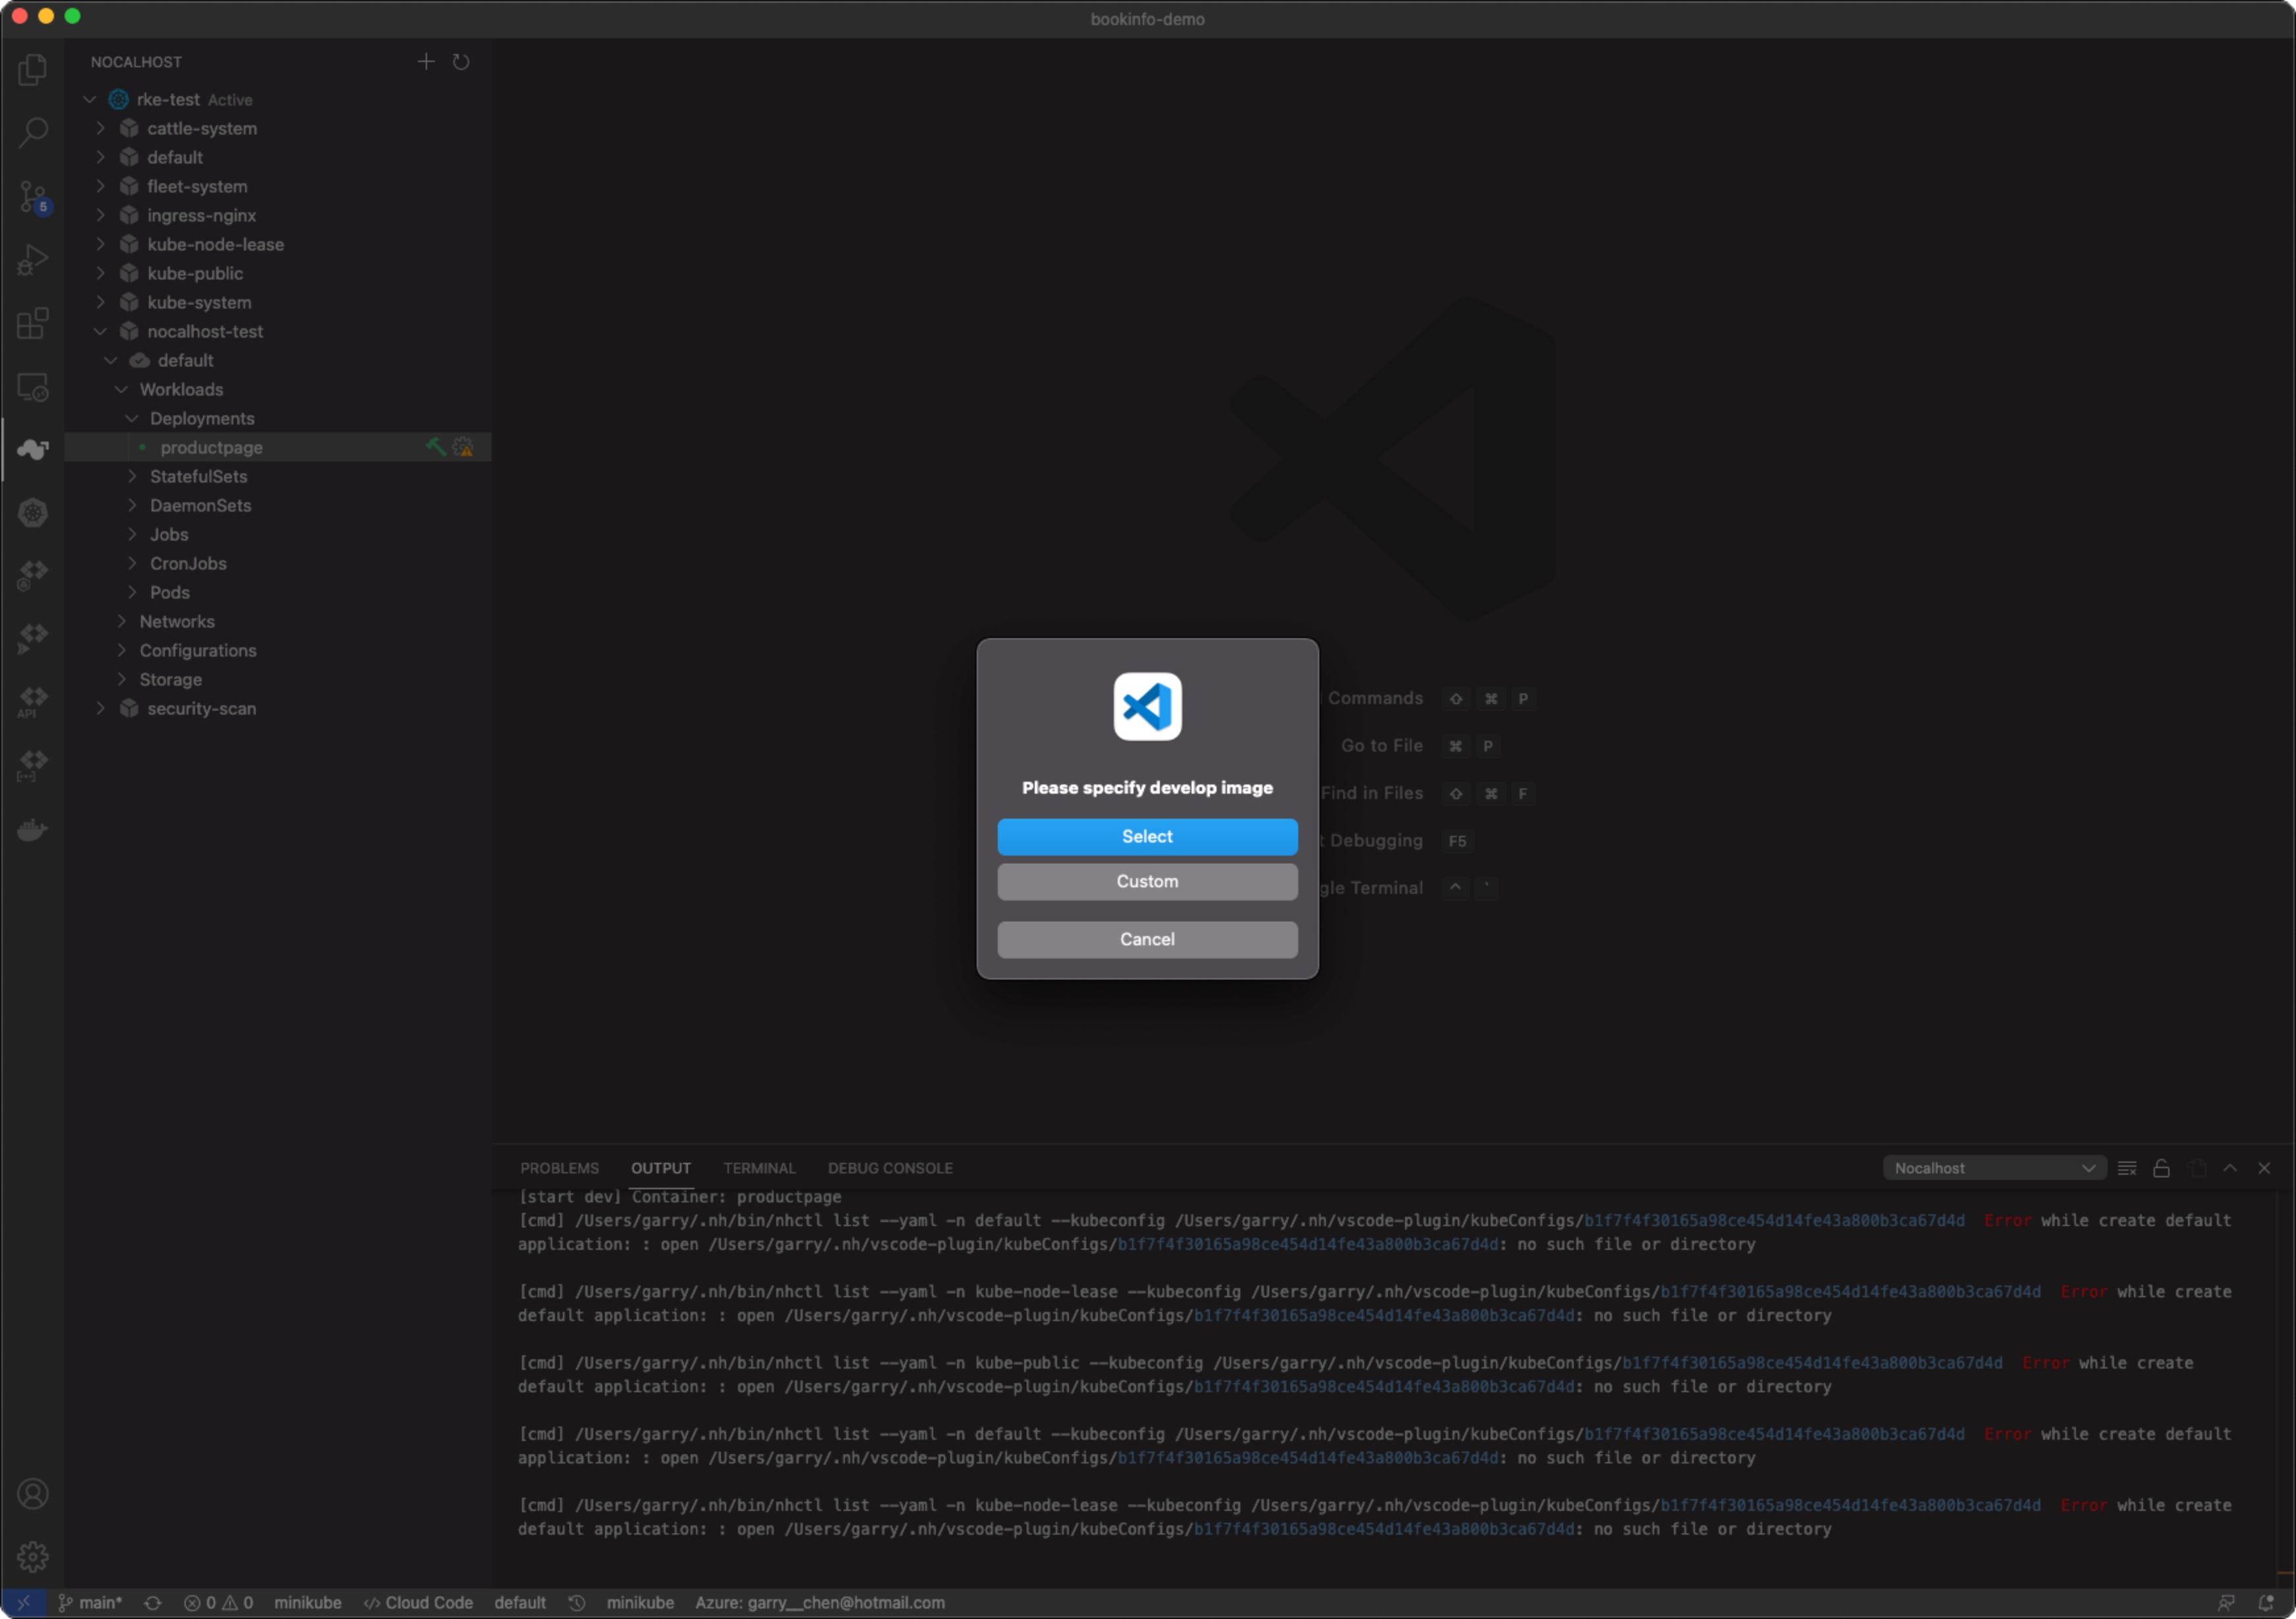
Image Pull
Container image will handle by Kubernetes, read more to learn about Kubernetes image management.
Start Development Mode#
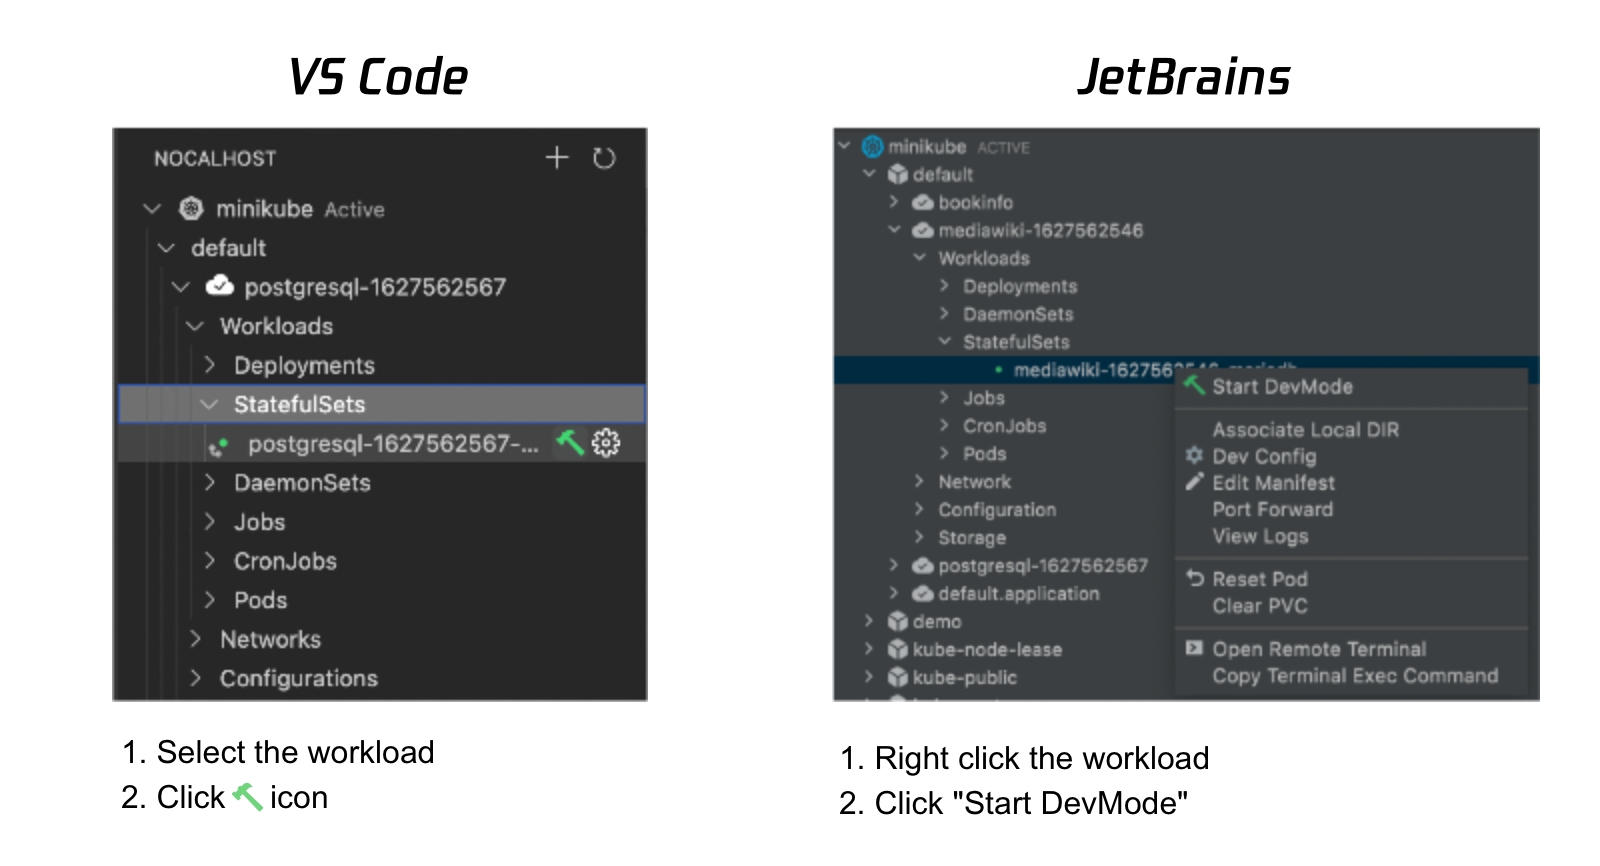
Select Workload#
- Expand the cluster inspector
- Select the workload you want to develop and click
Start DevModeorStart DevMode(Duplicate) - Select a container if you have more than one container in this workload
Container
If you have more than one container in a workload, you can only select one container to enter DevMode.
DevMode Process#
When entering DevMoe, Nocalhost will do the following things:
- Replace Pods according to your
replacing portconfigurations - Forward ports according to your
port-forwardingconfigurations - Sync file changes between your local project directory and the Kubernetes pods according to the
dev.syncsection - Open a terminal right within IDE after the container started. The opened working directory is according to your [
dev.workDir](/docs/config/config-dev-container-en#The Remote Directory for File Synchronization) section.
Once the terminal session starts, you start your application and work inside your container.
You can also use the remote run to run all the commands according to dev.command section.
Coding in Kubernetes Cluster#
Make sure you have done the following before developing:
- Start process inside the container or use the remote run to run your application.
- The port-forwarding you configured has successfully started or configure the port-forwarding in IDE
Status Bar#
Nocalhost will monitor the local files change and synchronize the changes to the remote containers. You can check the synchronization status in IDE's status bar.
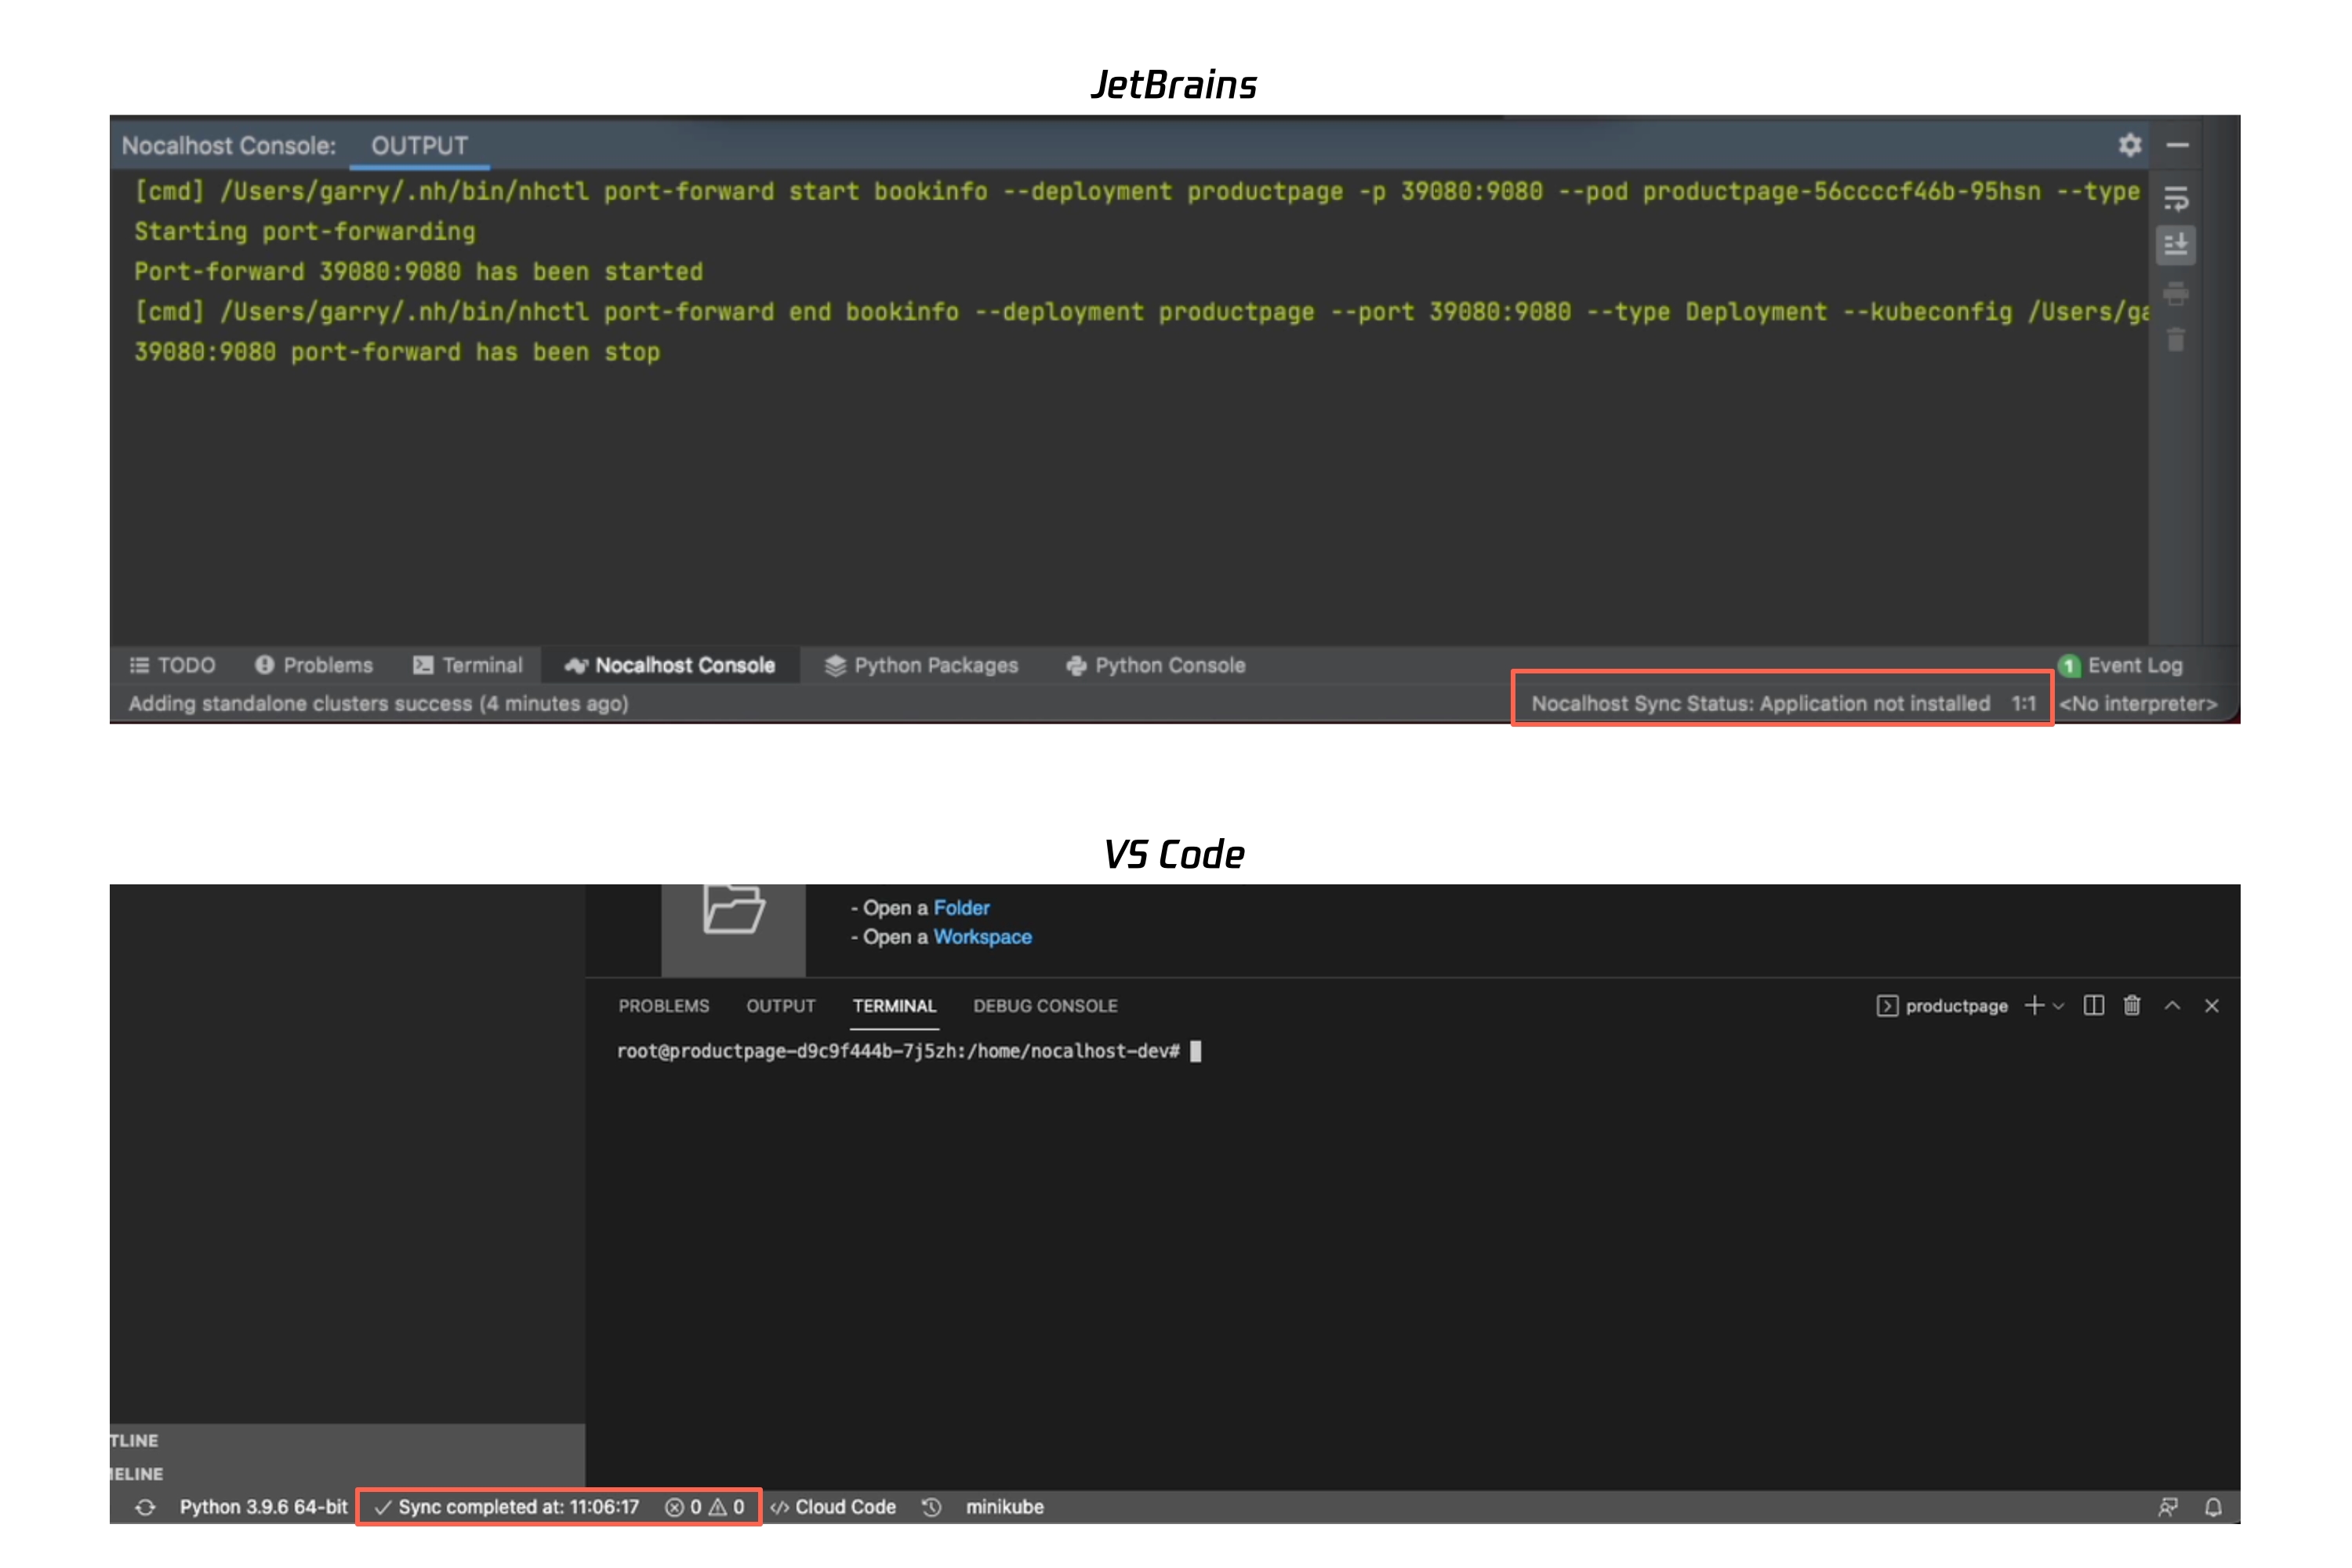
Disconnect & Reconnect#
If the file synchronization has disconnected, the status will change to Nocalhost sidecar disconnected. In this case, you can just click the status bar, Nocalhost will reconnect the file synchronization.
Open Project#
If you close the developing IDE window and want to reopen it again. Just right-click the workload which in DevMode and choose Open Project.
DevMode Only
Open Project only works in development mode.
End Development Mode#
When you finish developing, you can now end DevMode.
How to?#
- VS Code: Click the
 icon
icon - JetBrains: Right click the workload that in DevMode and select
End DevMode
Process#
When ending DevMode, Nocalhost runs the following process:
- Stop file synchronization and port-forwarding (if any)
- Stop the DevContainer
- Delete the current versioned Pod
- reset pod - Recreating and start the original versioned Pod
Other Useful Features#
Reset Pod#
Nocalhost can help you to roll back any Pod to its original version by Reset Pod.
For example, reset the productpage deployment, and you should see similar messages below:

Modify Manifest#
Nocalhost has a built-in manifest editor that allows you to edit and apply the Kubernetes manifest within IDE. After modification, Nocalhost can apply the new manifest directly.
Edit and Apply#
DevMode
You can not able to edit the manifest if the workload is in DevMode.
Delete#
COMING SOON