Configure
Apart from putting the configuration in DevConfig of IDE plugin (right-click), Nocalhost also supports putting it in source code directory, ConfigMap or Annotation. For example, You can putting your configuration into Annotation, Helm chart or rawManifest to avoid repeated configuration through IDE.
PRE-REQUIRE
Please make sure you have already known how to configure Nocahost correctly. If not, please read Nocalhost Overview first.
Zero-Configuration#
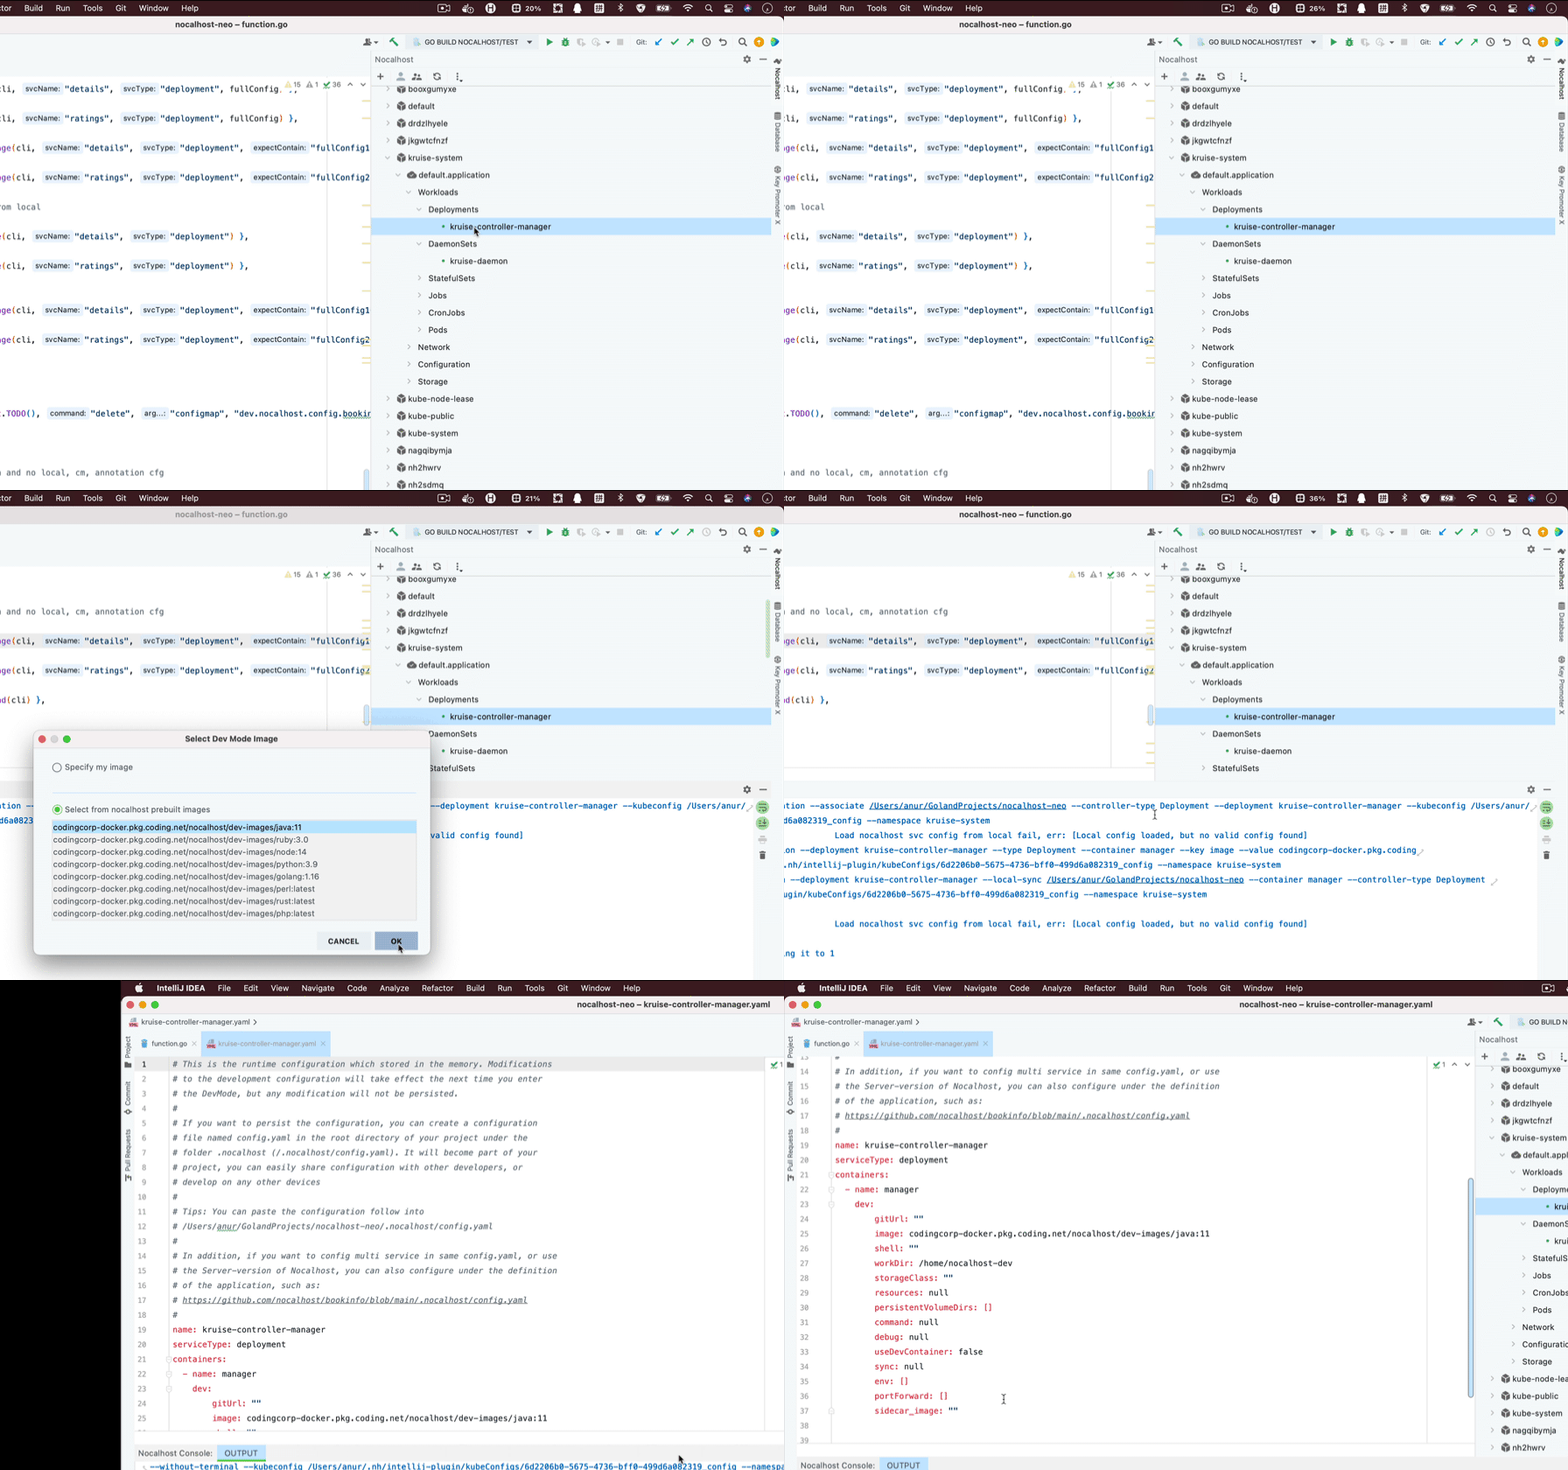
Zero-configuration means to enter DevMode without any Nocalhost configuration. The only thing needed is to select or type in a development image.

Behavior Expectation in Zero-Configuration#
Why care about the expectation of behavior?
In zero-configuration, you normally do not need to care about what Nocalhost has done. However, if any of the following behaviors does not meet your expectation, you need to configure Nocalhost to customize it.
- Use
/home/nocalhost-devin the container as the target directory for file synchronization. - Try to enter the development container by using the following commands in order: zsh, bash, sh.
- Without persistence enabled, the local data generated in the development container will be lost after closing or restarting the container.
- Unable to use one-click running and debugging
- Synchronize all contents of the selected directory into the container
Configuration in source code directory#
Nocalhost supports putting the configuration in source code directory, which can be done by experienced developers, so that other team members can share the configuration.
Add the configuration to source code#
Check that the configuration works well in the DevConfig of a specific workload (right-click). Then copy it as below:
Create .nocalhost directory in the corresponding source code directory, and then create a file named config.yaml. Paste and save the content in config.yaml.
Take effect#
Right-click this workload again and click DevConfig. You will find that the configuration has been read from the local directory and there is a "Tips" at the top, indicating that this configuration is a in-memory replica of local file.
Q&A#
When you forget which local directory the workload is associated to
Right-click this workload and click Open Project to open the associated directory or click Associate Local DIR to associate a new directory.
Multiple workloads in one source code
You can configure multiple workloads in one source code. To do this, add a layer to make the configuration items an array, as shown below:
Configuration in Configmap#
Nocalhost supports putting the configuration in Configmap, which helps to customize the association with the environment. For example, you can write some customized configurations in Configmap and apply it througth the deployment script or CD.
Add the configuration into Configmap#
Here we display a very general Helm template of Nocalhost configuration. Note that you do not have to use Helm, and this is just an example for better explanation here.
What is {{ .Release.Name }}
You can find that there are two parts in configmap that are introduced as placeholders. The first is {{ .Release.Name }} in the fourth line, which is the name of application. If you are using Helm or Nocalhost to install the application, you need to write the corresponding application name in it, otherwise it should be default.application all the time.
What is {{ .Files.Get .Values.nocalhost.config.path | nindent 4 }}
This is indeed the position where Nocalhost config should be written in, with four indents.
After knowing the above placeholders, we give the real configmap, as shown in the following format:
Notes for Configmap Configuration#
Notes
Naming rules: It must follow the format
dev.nocalhost.config.${appName}, namelyname: "dev.nocalhost.config.{{ .Release.Name }}".Labels: It needs a key-value label, which is fixed as
dep-management: nocalhost.config is in
data.configas a text block and please pay attention to the indent of the configuration.
Take effect#
After configuring Configmap, right-click this workload again and click DevConfig. If you get the following tips as below, indicating that this configuration is a in-memory replica of local file, that means the configuration has taken effect.
Configuration in Annotations#
Nocalhost also supports putting the configuration in annotations, which is for the same consideration as configmap.
Add the configuration in Annotations#
In like manner, we use a Helm template for explanation, which will help to understand which values should be customized and the corresponding format requirements.
Annotations configuration is very simple. Here you only need to declare an annotation, fix the key to dev.nocalhost and fix the value as a text block with six fixed indents. As shown below:
Since one workload will not have multiple configurations, there is no need to declare it as array (although array is also supported).
Moreover, the configuration has been fixedly bound to the workload (whether it is Deployment, StatefulSet, DaemonSet or others), so there is also no need to declare its name and type. As shown below:
Notes for Annotations Configuration#
Notes
The key must be
dev.nocalhost, and the value must be a text block ofNocalhost Config.Pay attention to the indent.
Take effect#
After configuring the Annotation, right-click this workload again and click DevConfig. The following tips means the configuration has taken effect.
Features of local, Configmap and Annotations configuration#
Granularity and priority of configuration#
Nocalhost supports hybrid configurations, for example, if there are ten workloads, three of them can be local, three are Configmap, three are Annotations, and the last one is zero-configuration.
If a workload is configured with multiple ways, the priority is as follows:
Local > Annotations > Configmap > in DevConfig
Configuration read time#
Before using Nocalhost configuration, Nocalhost will check all configuration methods and try to read them. Therefore, the read of the configuration can be considered to be real-time.
DevConfig Features#
Please read Nocalhost DevConfig Features